Best YouTube Lights – Perfect Setup for a Small Home Studio
Gabriel
Reading time: 8 minutes


I built this setup, especially for YouTubers who shoot in small spaces.
Also, the lighting setup is on a budget, but it achieves a professional look.
The strange thing about the technique I’m about to show you is that it is not super obvious, and very few people use it.
However, the results are amazing, and the space saved in your studio is huge.
If you want to shoot YouTube Videos in a normal apartment room, with classic lights, it will look like this:

But if I add my secret YouTube Lights, with the technique I am about to show you, much better:

And the best part: these YouTube lights don’t take up space in the room.
It’s a perfect lighting setup for small spaces, super budget-friendly, and powerful.
You will find out:
And yes, it’s perfect even if you shoot your videos with a fancy mirrorless camera, an iPhone or a webcam.
The quality of your videos will be at another level if you use the setup and the technique.
Maybe you saw a ton of creators recommending big softboxes to have a diffused light.
Also, a big professional light.
That is not bad, but in a small space, one big softbox can be super tricky to use.
Big lights will also produce a ton of heat and are also expensive…
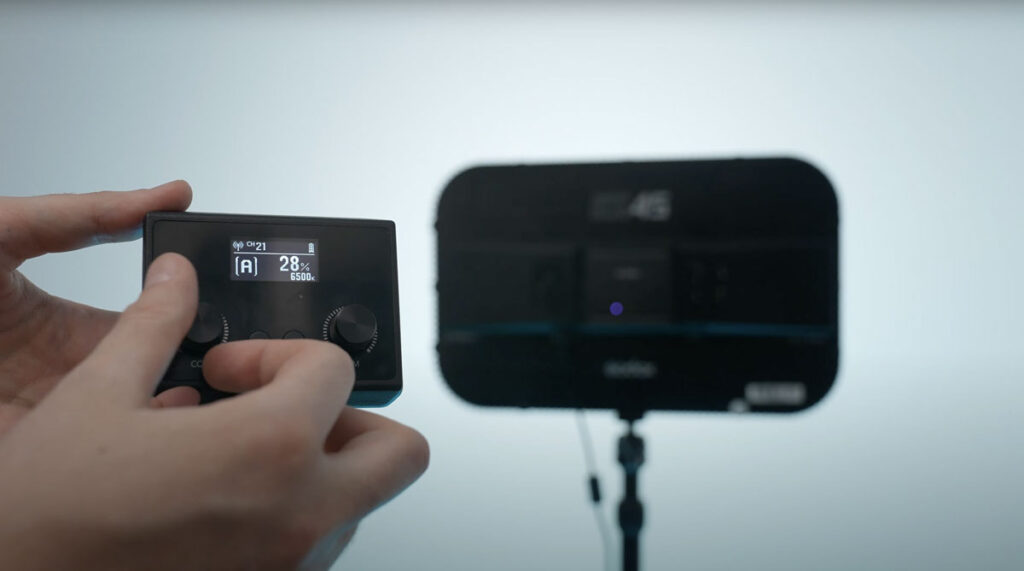
What I use instead are these YouTube lights from Godox, ES45.

The lights are thin! Here is a comparison with a pen:
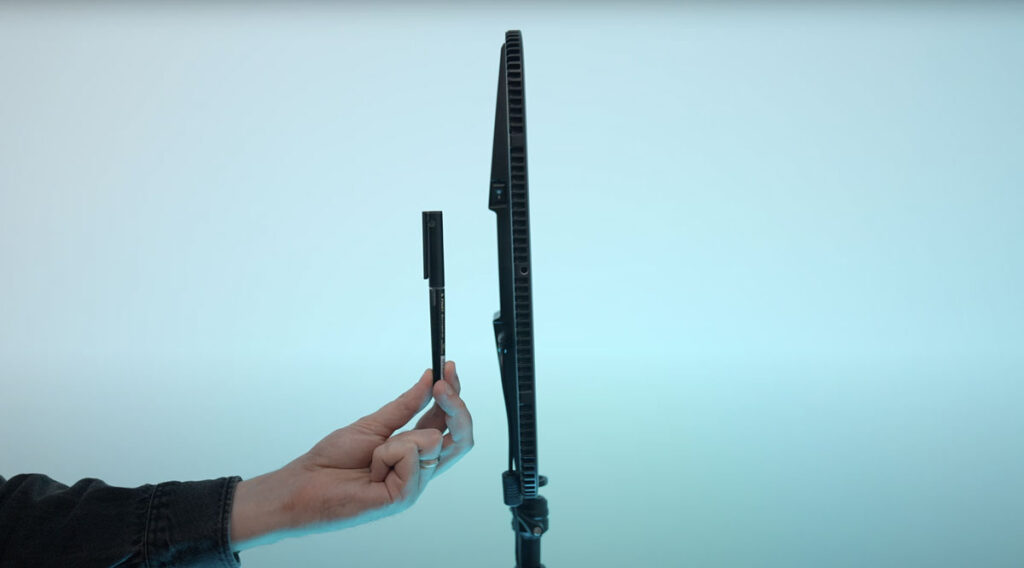
Also, they don’t take up any space. And the light quality is super good, powerful enough for a normal apartment room (My room is… 10 by 8 feet).
And the best part is that these lights come with desk stands.
A ball head is included, which will help you position the light exactly as you want.
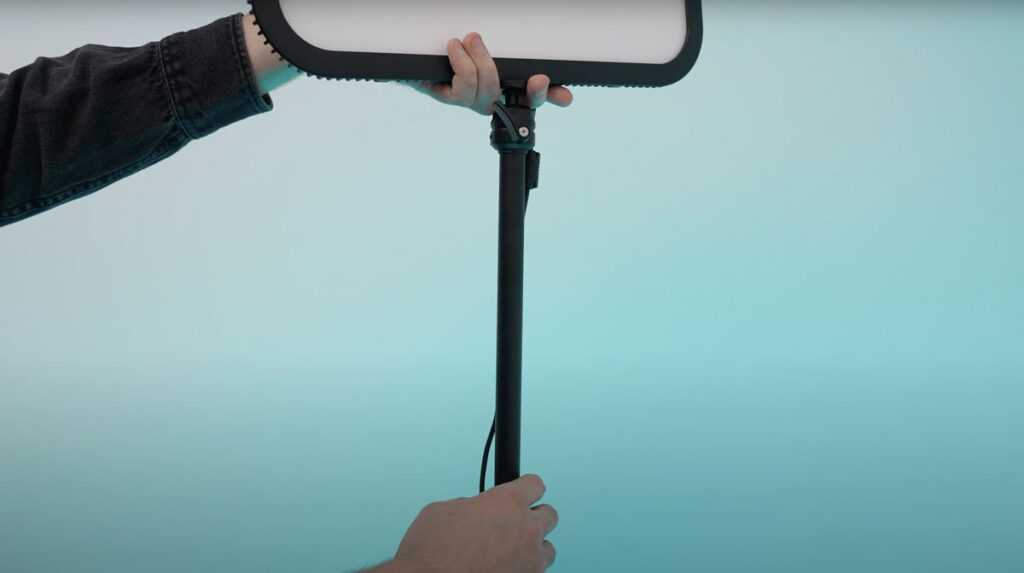

By having the lights attached to the desk, you will get rid of the light stands that are super annoying in small rooms, and also, with these lights, you don’t need any softbox.

Another plus, which makes these lights the Best YouTube Lights: The entire system is perfectly quiet.
No fans inside are making an annoying noise that you will hear on the recording.
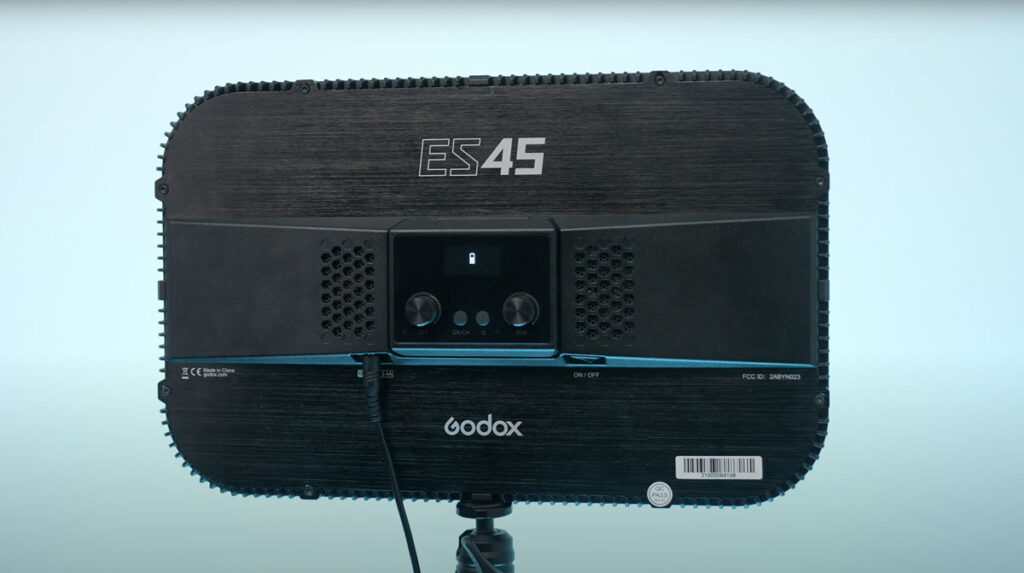
And we can control them with the included remotes.
You can change the light intensity and the color temperature.
The remotes are magnetic, and you can connect them to your lights to charge them, or you can charge the remotes with a USB Type-C cable.
Honestly, I don’t know how long the batteries last.
I’ve had them for more than two years, and I never charged them.
From time to time, I connect them to the lights to clean the desk, and they will charge up.
Also, you can control multiple lights with a single remote.
And if you want different settings for each light, use different remotes.
For the first step, I recommend you apply the professional method and start with all lights turned off.
With the curtains closed to have perfect darkness in your room.
I will show you how to light your scene without glasses, and also the biggest trick to look great if you wear glasses.
After you turn off everything, turn on the main light, which is called by the professionals: The key light.
I have this light positioned on my right side, at a 45-degree angle.

Turn it on and adjust the intensity to look good and have the right exposure.
We can observe that I have a hard shadow on the left side of my face.
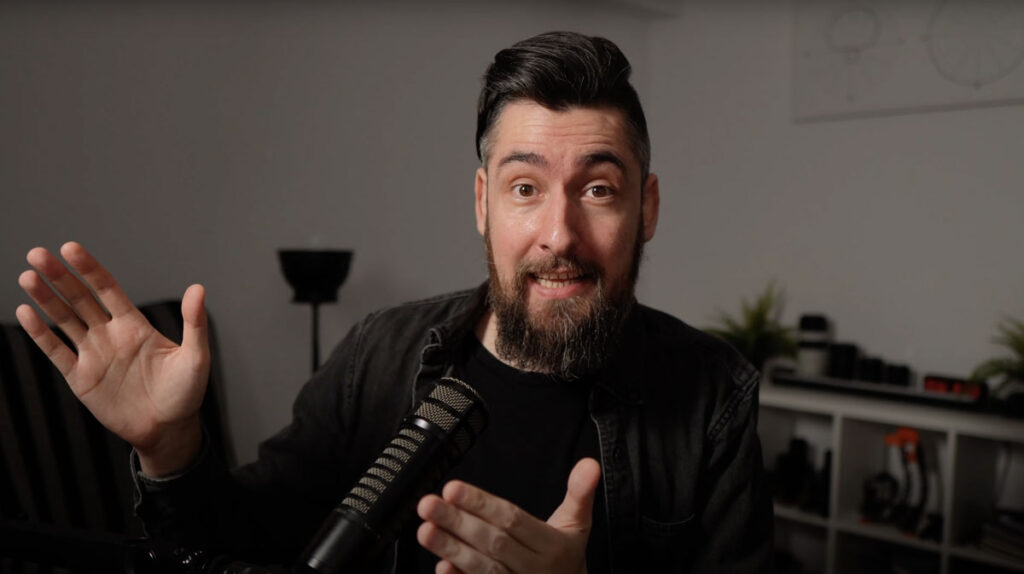
That can sometimes be cinematic, but it is not suitable for all situations.
To solve this, let’s go to the second step:
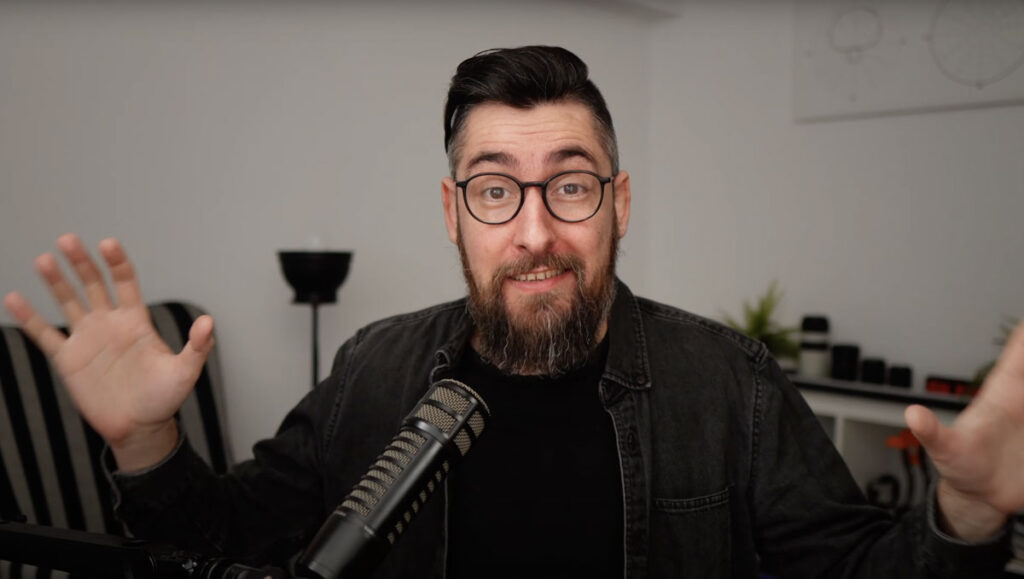
Turn on the second light that is positioned on the opposite side. This light is called The FILL Light.

Now, the intensity of this light is up to you. If you want a more cinematic look, adjust a lower intensity for this light, or make it equal
And we already see a huge improvement in the image.

Let’s go to the next step and make this image even better, but first, I want to show you a special technique.
This will make the image even better, and it’s perfect if you wear glasses:
If you have a white wall in front of you, you can bounce the light from that wall.
The light will be more diffused, and you will get rid of all the hard shadows.
This technique will also help a lot if you wear glasses.

Of course, this may not be the most cinematic style, but you can adjust the position and the intensity until you find the sweet spot for you.
Look how nice the light is like this. And because I positioned my desk facing the corner of the room, I also have some depth of the field.
This is how I have my lights positioned most of the time, and it’s perfect for me because I’m wearing glasses and the light is more diffused than if I use a softbox, but it’s not that directional.
And now, let’s take the next important step that will change everything!
Let’s make a simple, boring, white background look great. Easy, and cheap!
Here, it depends on what kind of background you have.
If you have a dark background, that will look better, and it will be easier to have a cinematic look.
But even with a white background, you can do a lot of things if you use one or more practical lights.
I will give you an example now with one single, cheap RGB light from ANDOER.

I’ve had this for a long time. The battery is good, you have multiple mounting points, it is dimmable, RGB, and you can charge it with a USB-C cable.
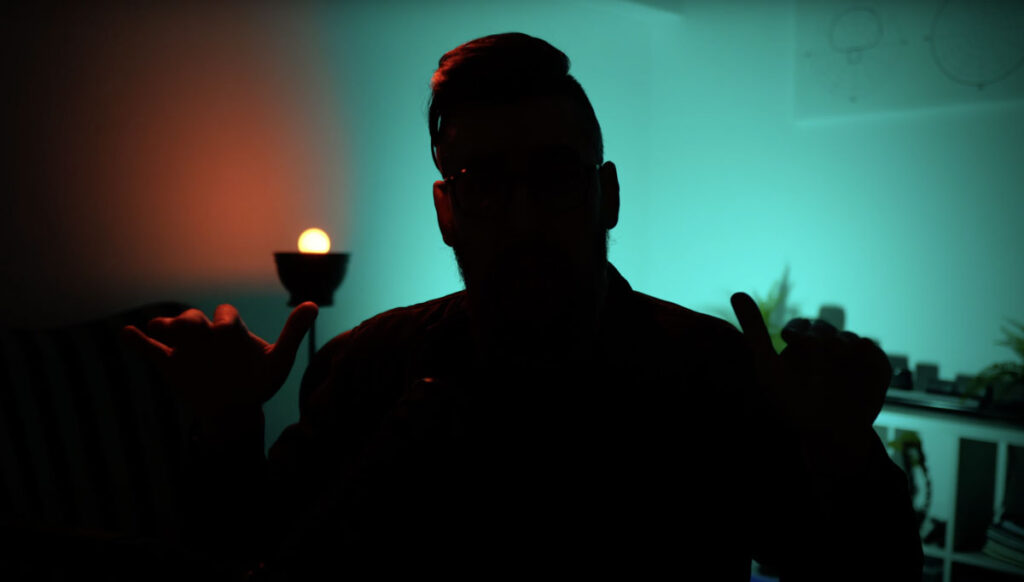
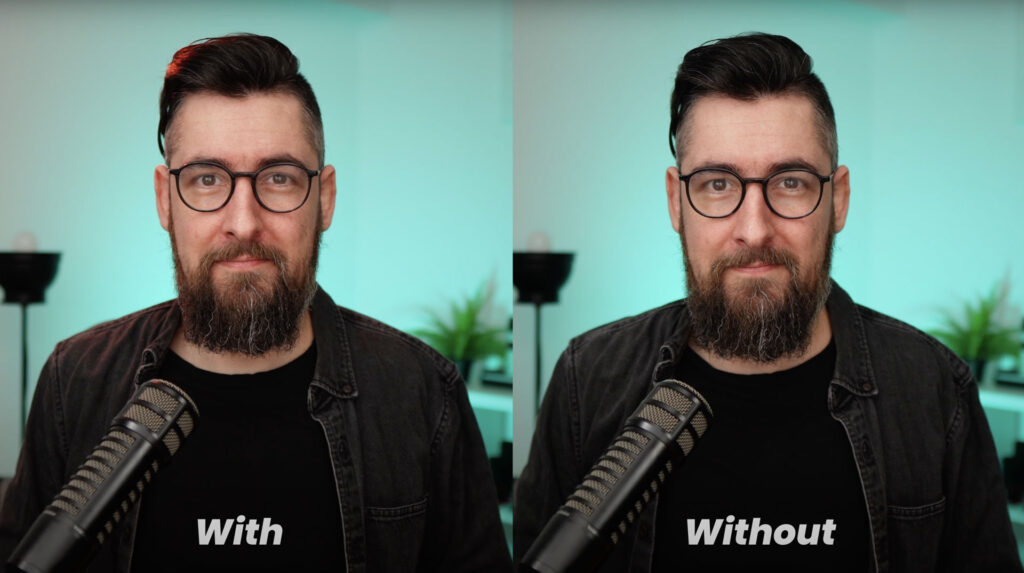
What I like to do is light up the background with a color.
You can choose this based on what you like.
I like this blue one, but according to your brand identity or your preference, you can change that.

But! If you want to make this even better, you can add a hair light.
What is that?
A small light placed above you, a little bit behind your head, that will light your shoulders and your hair.
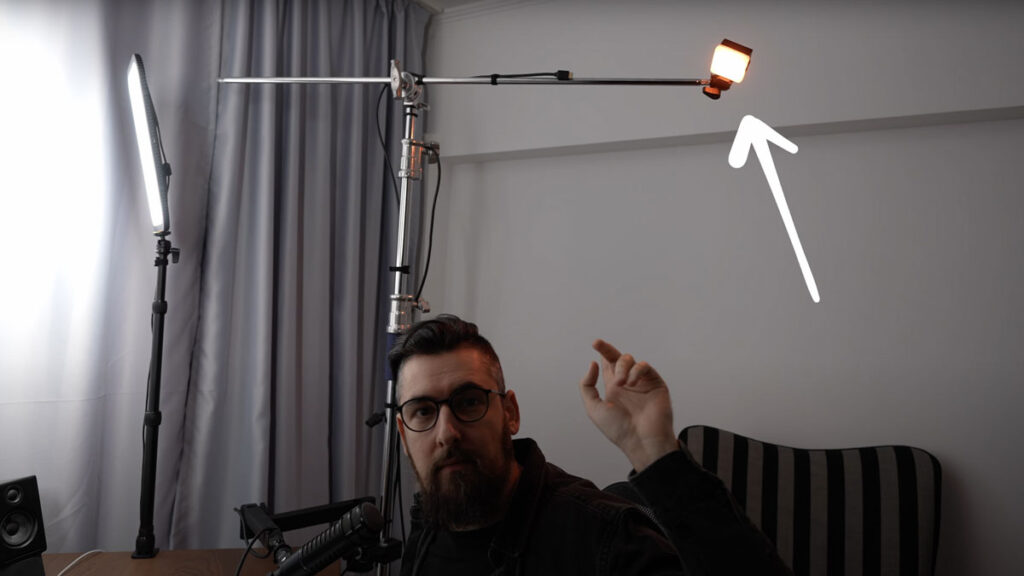
This will create a bigger separation, and you will stand out more from the background.
If the background light is blue, like in this example, I will have this light orange, and that will create a super nice effect.
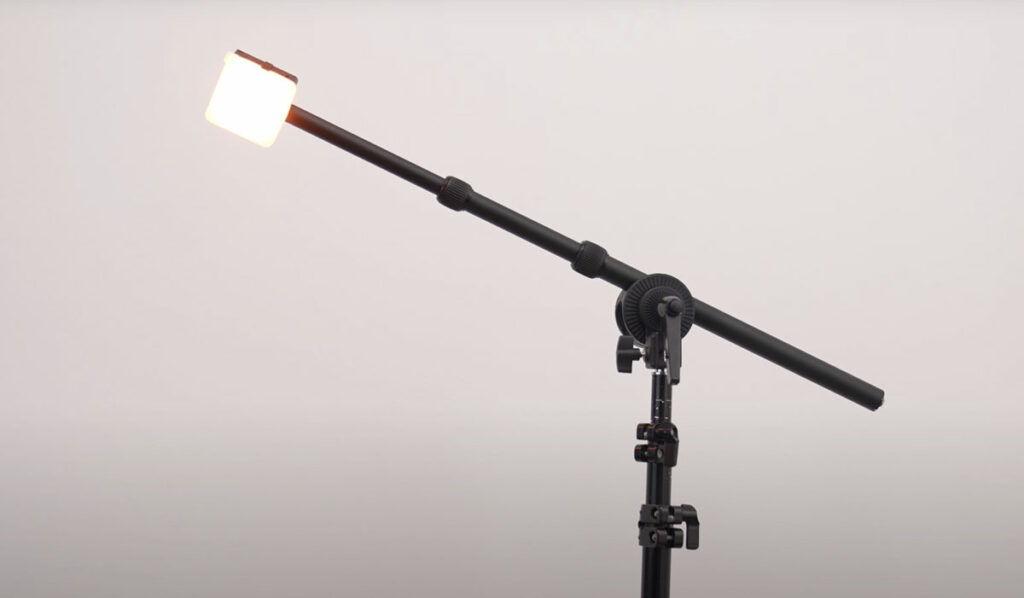
For this light, I use a Ulanzi VL49 PRO. It’s a small, RGB rechargeable light, and I like this one because it comes with this little diffusion, and it’s a little bit softer than others.

If you can and want to drill a hole in your ceiling, you can attach it with some magic arms, but I don’t recommend that.
Unfortunately, the only easy way I found is to use a light stand with an adapter and an extendable arm.
Like this, you can position the light right, out of the frame.
Of course, if you don’t think the difference with this hair light is worth the effort, you can skip using it; that’s not a problem.
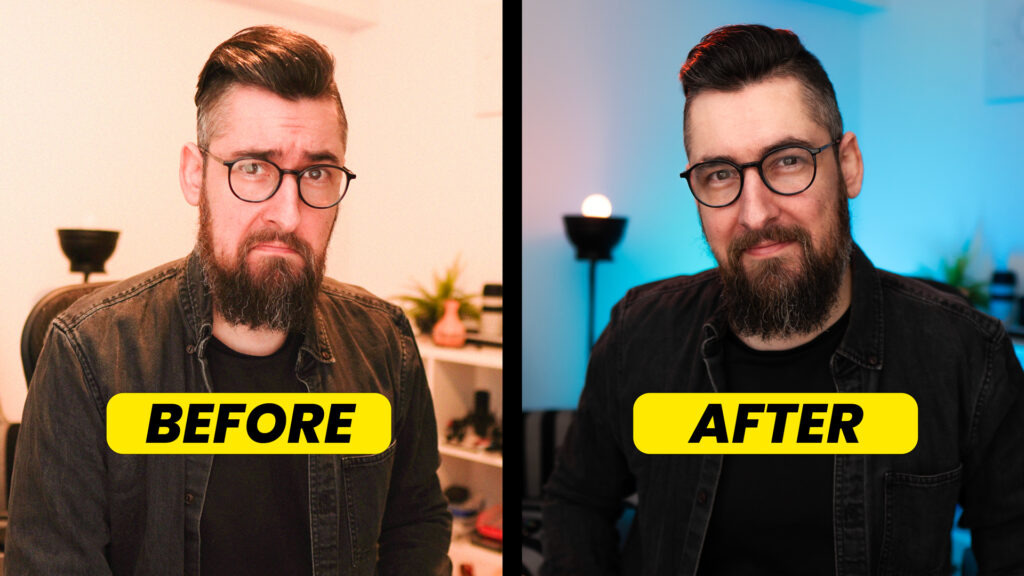
Let’s take a look at the before and after using my Best YouTube lights setup!

If you want to see a video version of this entire article, I will give it to you here:
Yes! With two Godox ES-45, you can shoot perfect YouTube videos.
Yes, but I recommend two because you will have more control of the light.
You can use a white photo light reflector and bounce the light from the reflector.
Yes! Godox ES-45s are great lights for streaming.
If you want to learn more and build your full beginner YouTub Setup, I recommend also reading this useful article: Beginner YouTube Equipment List for Talking Head Videos in 2025
