Beginner YouTube Equipment List for Talking Head Videos in 2025
Gabriel
Reading time: 8 minutes

I will share with you the best YouTube Equipment Kit and guide you through building the perfect setup.
You need a well-suited setup that fits your specific needs as a talking head creator.
Do you want to start a YouTube channel to grow your personal brand and business?
If your answer is YES, and the equipment gives you a headache, you are about to solve this problem.
I have good news: people love the quality of my videos on YouTube.
I will share with you my full YouTube equipment kit and guide you through building the perfect setup for your channel.
There are so many options for YouTube equipment, and creators often recommend different variations based on needs.
The big question is about what the best setup is for your needs.
You don’t need the best setup or the most expensive one.
You need a well-suited YouTube equipment setup that fits your specific needs as a talking head creator.
The best setup can easily cost over $10,000, but you can create a smart and budget-friendly setup for talking head videos with $2500 or less using the right YouTube equipment.
The difference between a talking head setup and a travel vlogging or vlogging setup in general is significant.
Creators recommend, most of the time, cameras and equipment that are good for everything.
But this will increase the cost of your setup significantly without providing real benefits.
If you want to start a talking head channel, you will use your camera on a tripod. Because of this, you don’t care about image stabilization or rolling shutter.
For this kind of video, the most important aspect is the audio, and you need a good, professional audio setup.
If you travel, you don’t need studio lights. For talking head videos, you need a great, space-saving, and professional lighting system.
Let’s take every aspect, step by step, and find the best YouTube equipment while saving money and gaining quality.
Good news: you can start building your channel, creating videos, and practicing with a minimum setup.
After you start, you can complete it step by step, making the investment easier to handle.
To start, I recommend focusing on the camera, a good audio setup, the proper lighting setup, and a few accessories.
With a setup like this, you can start creating great, valuable YouTube videos.
The short answer is no!
But I strongly recommend starting and investing in good equipment. A well-chosen, smart setup can be used for years. The cheapest one will need to be changed in a few months.
The cheapest approach to YouTube equipment can cost you more in the long run because its value diminishes quickly.
The illusion that it’s okay to invest in the cheapest choice is dangerous. And if you make this mistake, in a short time, you will need more! The cheapest equipment won’t be worth enough to sell and recover anything.
On the other hand, a good investment will be useful for years.
Build your setup step by step, with the proper equipment, and enjoy the benefits for years.
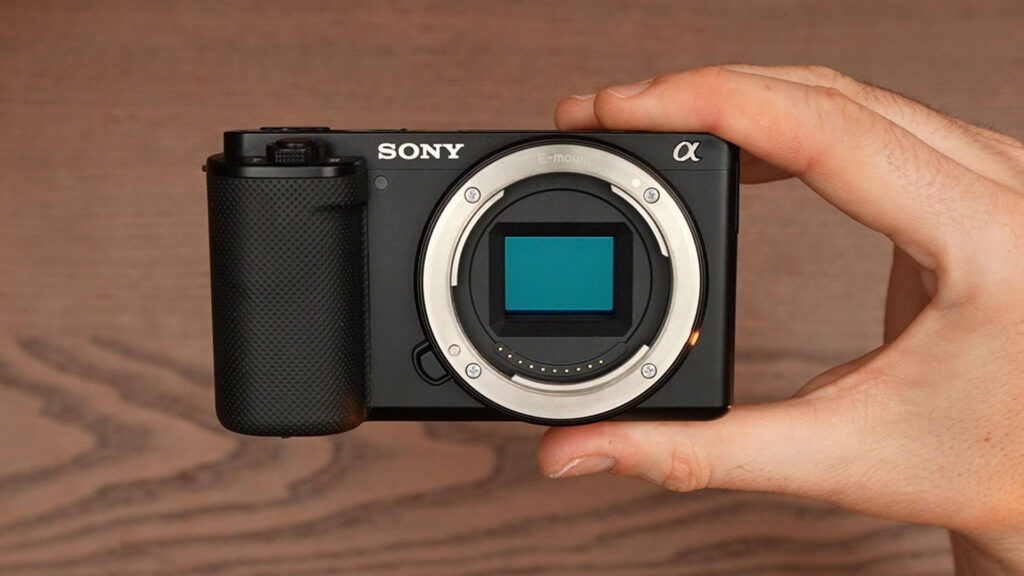
I have used, tested, and recommended the Sony ZV-E10 for years. And I still use it today.
This camera is the perfect camera for talking head videos.
The image quality is crystal clear, you can shoot 4K without limit, stream, or do online calls in 4K or FHD if you use a capture card like the Elgato Camlink 4K.
The autofocus is perfect, it has “Product Mode” if you need to show products, and it’s easy to use.
With the right settings and a dummy battery, the camera will never overheat.
(I will give you a video where I show the best settings to avoid overheating and good dummy battery options.)
My videos on YouTube are created using the Sony ZV-E10. After years of use, I am 100% satisfied with this camera.
The body has a price of around $698, and the body with the kit lens is around $798.
You will also need an SD card, and I recommend the SanDisk 128 GB.

The kit lens is a great lens for talking head videos, but it’s an f/3.5–5.6 lens.
If you want to accentuate the blur behind you, I recommend a fast lens like the Sigma 16mm f/1.4.
This lens is wider, and you will have more blur behind the subject and need less light in the room.
You can check my videos on YouTube to see the image shot with the Sigma lens.
Last, but not least, you will need a mini tripod to attach the camera.
I recommend the VT-20 from SmallRig. This mini tripod is solid, has the perfect height for talking head videos and desk use, and is affordable.
In the audio zone, you need to be very careful.
Audio is more important than video, especially for talking head videos!
If your audio quality is not great, you can lose the audience in seconds, even if you have the best image.
In this case, you need a microphone that’s great in most situations for talking head videos.

What I recommend is the Audio-Technica AT875R.
This microphone works perfectly close to the mouth, in the shot.
I recommend this method when the room has a lot of reverb and echo. Having the microphone closer to the mouth will help avoid bad audio.
But also, you can use it out of the frame while maintaining good sound.
It’s a phenomenal microphone for any situation, listed at around $169.
And the good news is that it works with almost any audio interface that has 48V Phantom Power.
(You can check my video to hear the audio recorded with the AT875R.)
Because you need to connect it to the PC, an audio interface is mandatory.
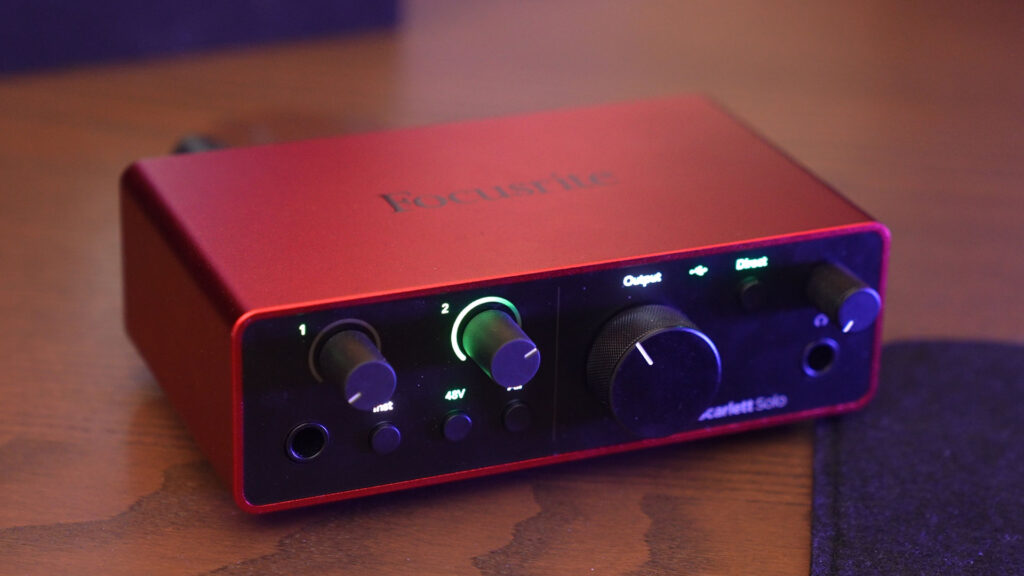
The best pick for this microphone is the Focusrite Scarlett Solo 4th Gen.
I have used this audio interface since it was released. I am more than satisfied.
The audio is amazing, the mic preamps are great, it works excellently with the AT875R, I can connect speakers, great headphones, and it’s easy to control.
A big bonus is the size and the design. It looks great on the desk and doesn’t take up much space.
The listed price for this audio interface is around $139.
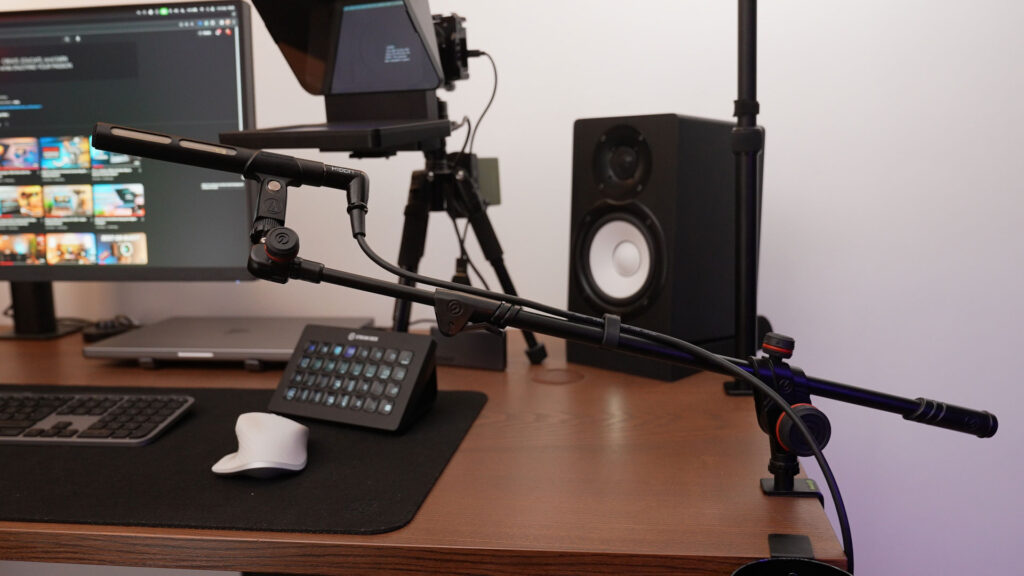
Of course, having the mic in the proper position is a crucial aspect, and for this, I recommend the Gravity stand that’s attachable to the desk.
It’s thin, you can use the microphone in both positions, close to the mouth and overhead, and it’s cheap, around $45.

If you want to have a great image, you need a good lighting system.
In general, lights are big space-takers, noisy, and expensive.
I like to use a lighting system that solves all these problems.
I recommend two Godox ES-45 Video Lights.
They’re lightweight, come with desk stands, remotes, and are affordable.
The Godox ES-45s are exceptional lights for tiny rooms and desk use.
The brightness and the color temperature are adjustable, and you can use them without being connected to the PC or phone apps.
I have been using them for over 4 years, and the light is exceptional.
And the big bonus: these lights do not have fans inside that create noise.
One light is around $139.
Yes! If you have your camera attached to the tripod in the right position and powered with a dummy battery, you are good to shoot videos.
Yes! The ZV-E10 is great for streaming if you use it combined with a capture card like the Elgato Camlink 4K.
Without the Camlink 4K, the camera will overheat, and the quality is only 720p.
NO! You can shoot perfect videos with the kit lens, but keep in mind that the blur behind you will not be that accentuated.
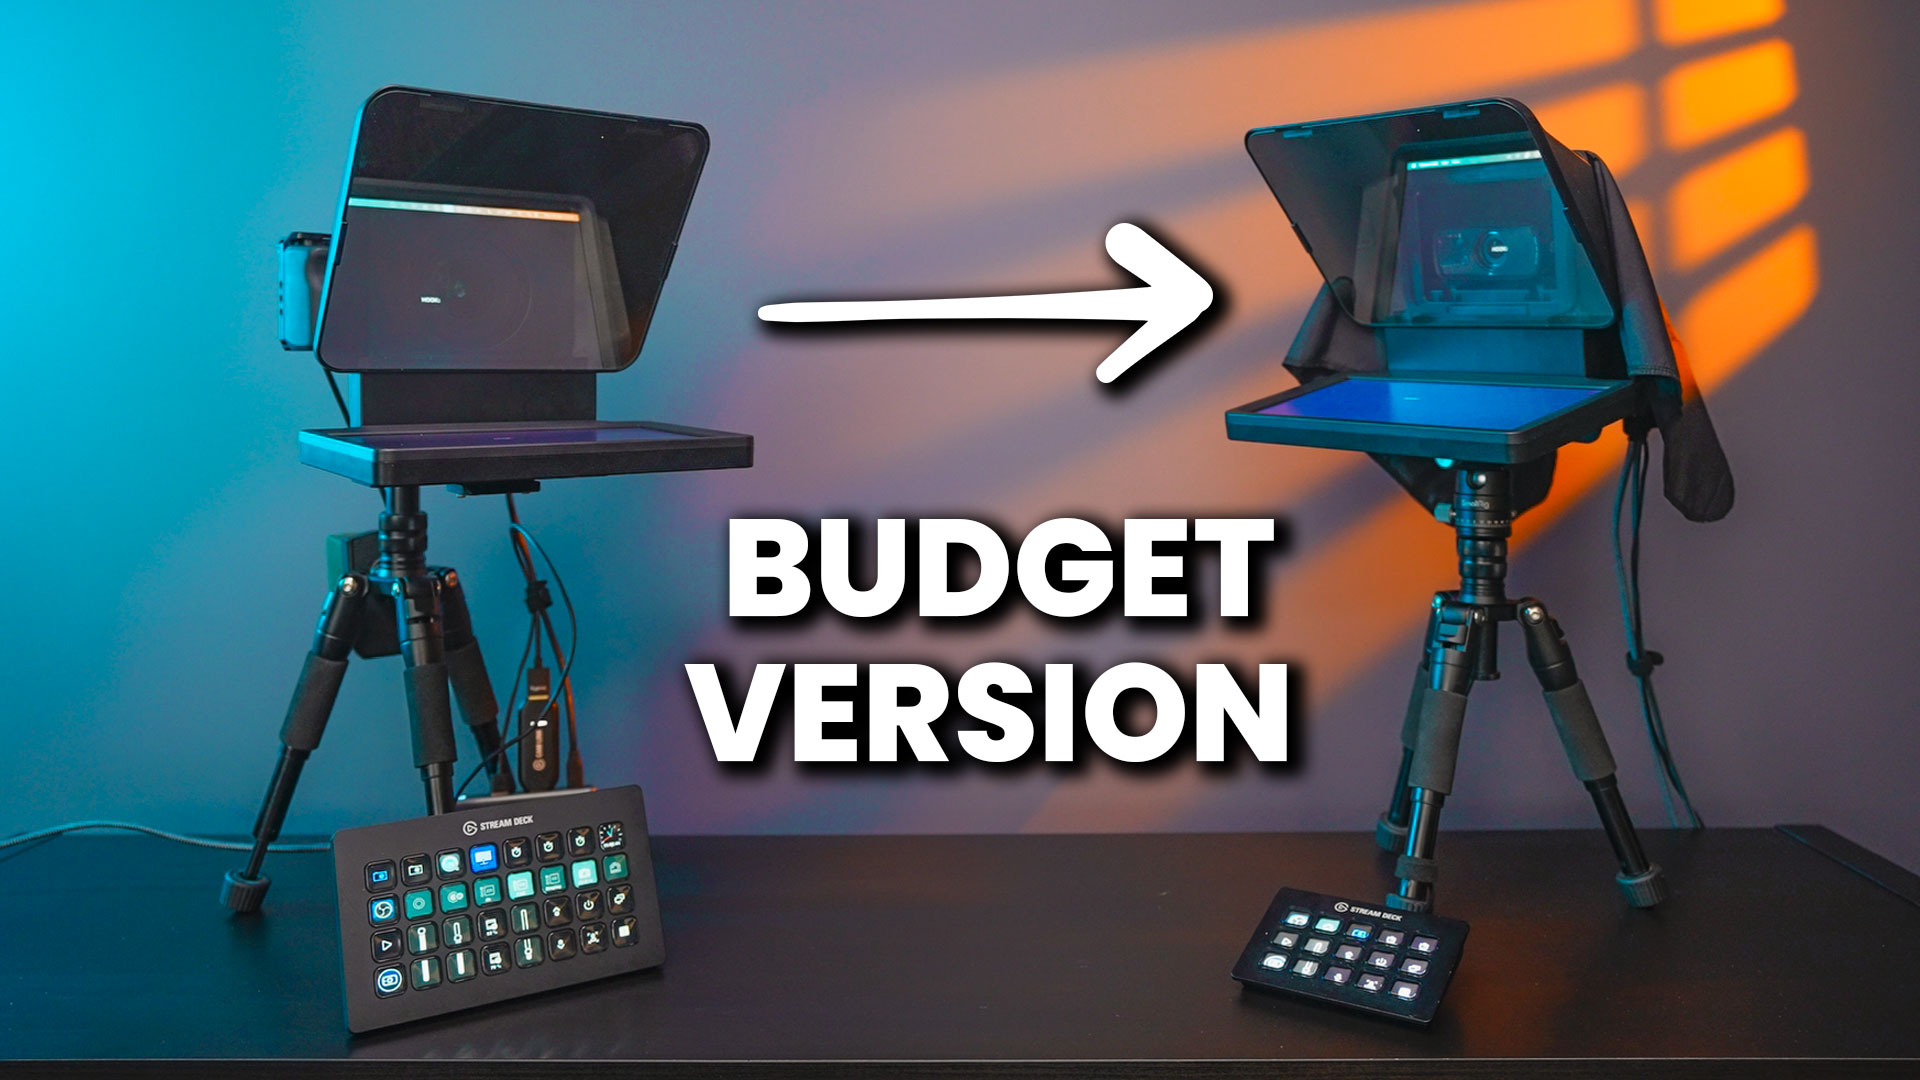
Yes! You can combine the Sony ZV-E10, like I do, with the Elgato Prompter.
NO! With the Scarlett Solo 4th Generation, you can record only one microphone. If you need two microphones, use the Scarlett 2i2 instead.
Yes! But keep in mind that with the kit lens, you may need more light. Even with the Sigma, you will need a powerful light, but with this lens, one light can be enough.
If you use only one, the light will not be that cinematic, and you can’t create a complete effect.
You can use only one, but I recommend two.
